
|
Hello, everyone! Today, I want to share a link to something pretty exciting to me - a podcast that I was interviewed on! Several months ago, I discovered the Roundabout: Creative Chaos podcast that is created by, for, and with, creative folks ranging from professional artists to humble authors (guilty as charged), and everything in between. As I listened to episode after episode, I began to realize that there are countless people out there whose lives heavily revolve around being creative, professionals and hobbyists alike! So if you are a Creative, I promise you’ll enjoy the Roundabout: Creative Chaos podcast. Click the image below to listen to my episode, but don’t stop there…you can subscribe on any major podcast app (iTunes, Overcast, etc.) so you never miss another creative dive into a creative mind! Until next time, go BE the YOND! 
0 Comments
For this post I'll be talking about video games and their impact on instructional design. This idea came to me earlier today while playing Mario Kart Wii with my son. At 36, I'm three decades older than Avery, but as I watched him play, I couldn't help but find a new appreciation for the Mario Kart franchise that I, too, played when I was younger, in that it serves as a great generational equalizer. You may have another game that allows you to relate to younger ones just as I have with my six year old. Watching him have so much fun with a game I also love got me thinking about how this phenomenon can be applied in the work place. And there's no mistake about it, it is a phenomenon. As a father, I'm in uncharted waters in my family in exploring this method of connecting with Avery. When I was his age, video games were just coming to market (The Nintendo Entertainment System, for one). And sure, my dad could play the games with me, but he didn't have the nostalgic privilege of reacquainting himself with characters he met as a child. The same is true for today's workforce. With millennials on the rise in the workplace, I would be a fool not to consider ways to lessen the generational gap when developing corporate training modules. Take a look at the image below (from Mario Kart Wii) that players are presented with after a Grand Prix - a series of four cumulatively scored races - and try to pick out the instructional design concepts that are in play on this screen alone. Then, read on to learn my take on it. 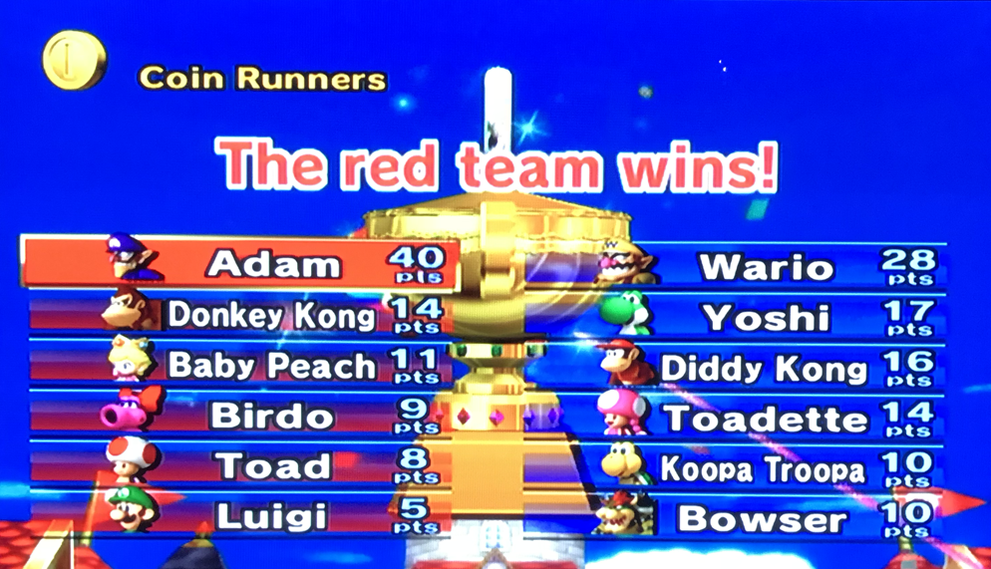 Here's what I see when I look at this image:
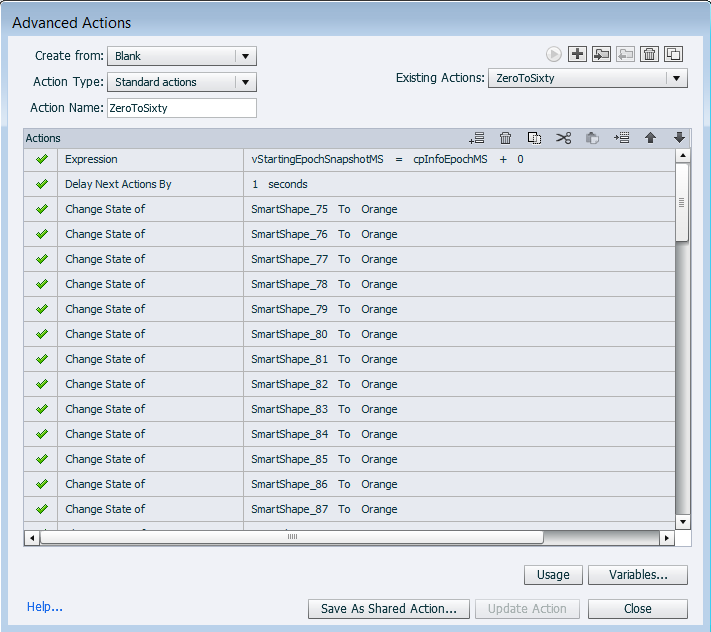
Until next time, go BE the YOND! The Question: Just how fast do advanced actions execute themselves? The Answer: At times, I’ve found myself pondering that same question. And to find the answer, I set out to test it in the real world. My process, and findings are below. First, I have no doubt that executing a single advanced action would happen too quickly to measure. So, I decided to execute a lengthy list of actions (60 in all, thus the aptly named title of this blog).
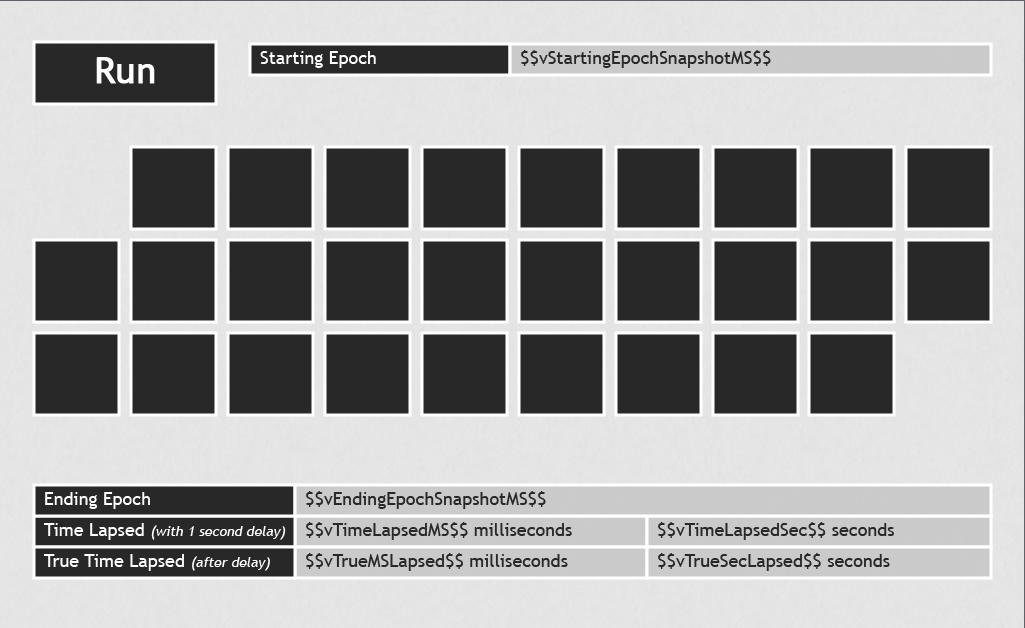
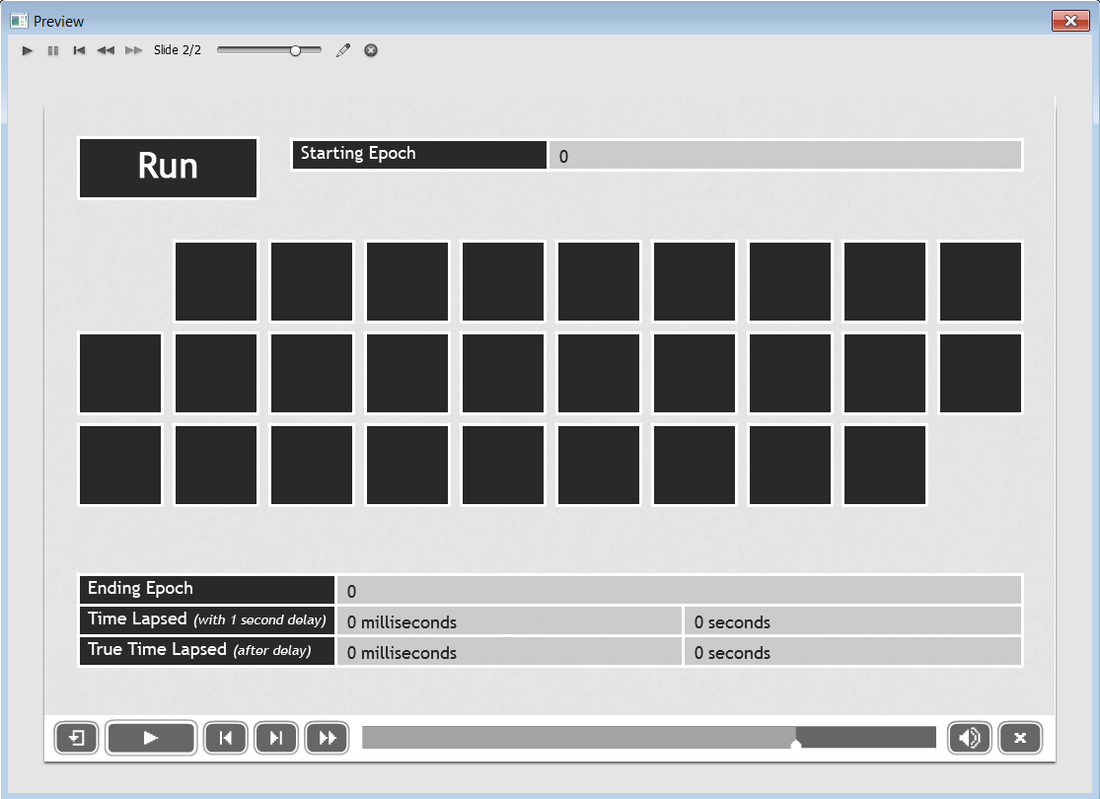
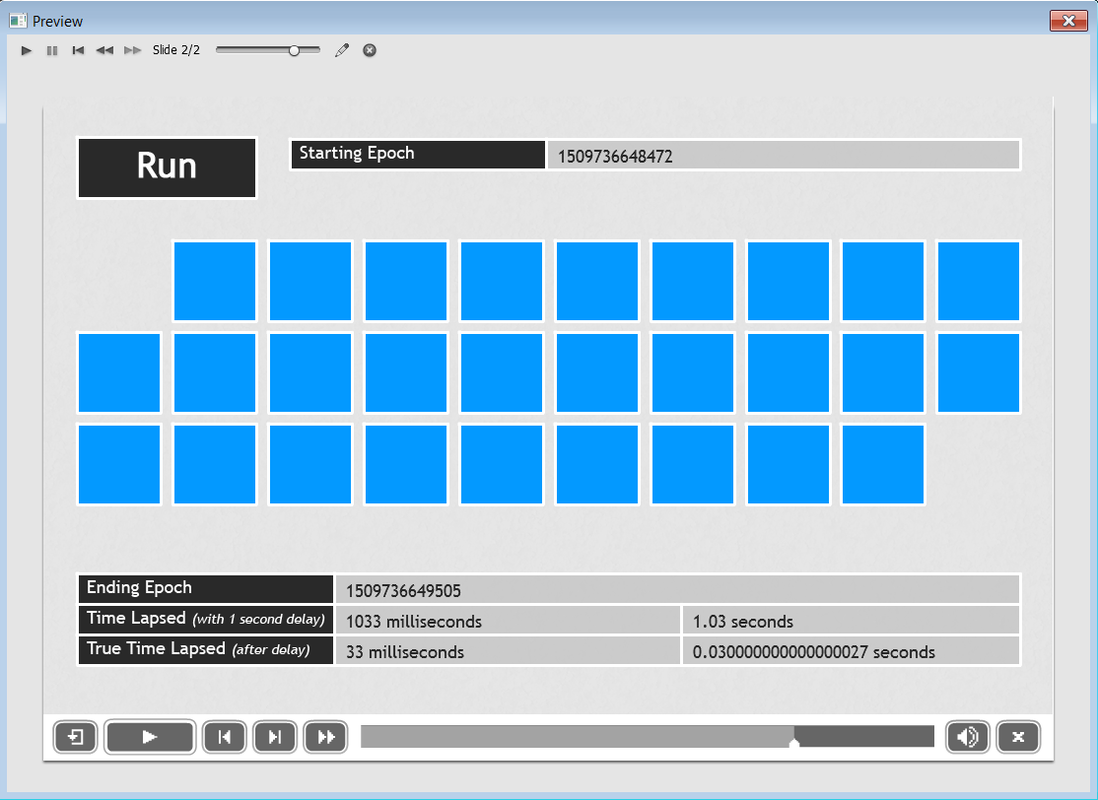 The Debrief: For my first test to execute 60 consecutive advanced actions, it took 37 milliseconds (0.037 seconds) not including the 1 second delay, which I added to allow the passage of enough time to register in the “True Time Lapsed” indicator boxes.
I did a total of 10 identical tests, for which there was a slight variance, but the stats for all 10 are as follows:
The Moral of this Story: When working with a lengthy list of advanced actions, there is no need to worry about a delay in user experience in order for the actions to fully execute. However, the order in which advanced actions are written/placed is incredibly important, because actions execute in a linear fashion (from top, straight down to bottom). Additionally, placing actions in a cohesive order will undoubtedly make it easier for others (and future you) to read and understand them at a later date. I hope this was helpful, or at least worth pondering. Until next time folks! Go BE the YOND! Hello, all! I recently realized that when creating a project in Captivate, it can be rather burdensome to find just the right colors to match your full brand spectrum. Thankfully, Adobe Captivate has you covered! Follow these simple steps to customize the built-in Swatch Manager, and make the default palette walk the plank! 1. Open a Captivate project file. 2. From the top menu bar, select Window, and scroll down to Swatch Manager. The default should look like this. 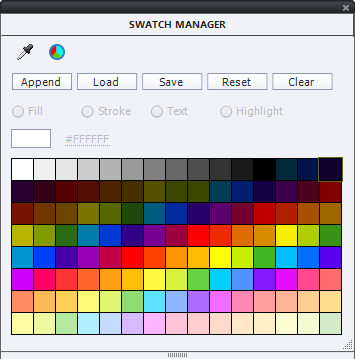 3. From the Swatch Manager viewing pane, click on Clear. 4. Click ‘OK’ in the subsequent warning box that appears (Don’t worry, your project itself won’t lose any colors, only the Swatch Manager color selector will be affected). Swatch Manager should now look this. 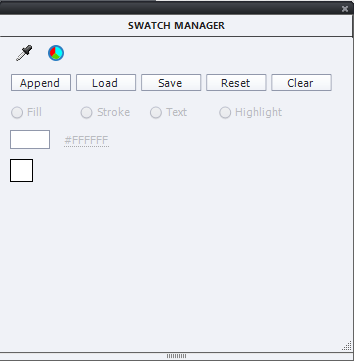 5. Next, click the small color wheel icon in the top left corner of the Swatch Manager to begin customizing the palette (you could also use the eye dropper icon to do this, but this tutorial will use the color wheel). See image below. 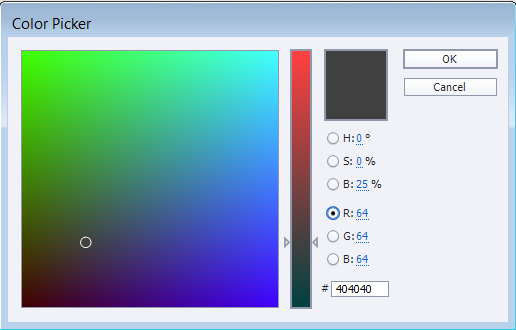 6. For this tutorial, I’ll be making a Primary Colors palette, but feel free to choose any colors you like from this point forward. 7. Select a color and click ‘OK’. 8. You will be prompted to give the swatch a name (NOTE: This name applies to that single color only, not the entire palette we are creating). So for my example, I’ll name this one ‘Primary Red’. Click ‘OK’ and you should see something similar to the image below.  9. Repeat steps 7 and 8 until you have added all of your custom colors. Once complete, move on to the next step. 10. When all is said and done, your Swatch Manager should look the image below (I like to have black and white bookends around my custom colors because it’s incredibly rare to not find a need for their use in a project). 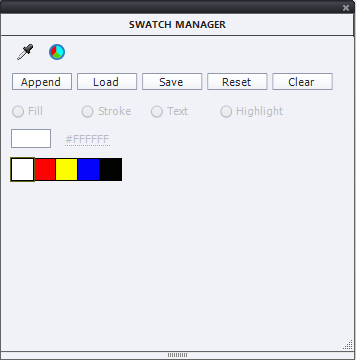 11. Click ‘Save’ and give this palette a distinctive name (For mine? You guessed it…PrimaryColors), and save it in a location you won’t have trouble remembering in the future – I keep all of mine in a folder called, ‘Cp Custom Palettes’. 12. To check your work, click on any shape in the open Captivate file. 13. From the Properties panel click Fill and choose the Swatches icon marked in the image below to begin using your newly customized color swatches! 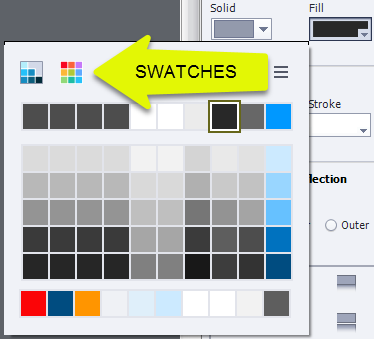 14. Finally, give yourself a nice pat on the back. You are now a Captivate Swatch-buckler!
NOTE: You will need to load the saved file into each new project you open (see the ‘Load’ button in the above images). Also, I like housing these saved palette files in my project assets folder for efficient future use. If you are looking for something a bit more permanent, however, stay tuned for my blog on customizing Captivate themes which have a considerably broader reach! Pro Tip: The file extension, .ase, stands for Adobe Swatch Exchange, and is compatible with other Adobe products. So what are you waiting for? Import away! Until next time folks, "Go be the yond!" Adam Hello, all. One day, a few months back, I was watching an episode of Brain Games on NatGeo. For those who are unaware of the show, in a nutshell, it’s a ‘sciencey’ show that focuses on how the human brain works. This episode, called Motion Commotion (click HERE to watch the episode), had a piece devoted to motion-based optical illusions where a static image appeared to be shifting, rotating, oscillating, etc. due entirely to how the brain interpreted the visual information it was given.
Another example from the show focused on what the makers of Brain Games refer to as Swimmers (essentially, the illusion of fish-like shapes swimming through water). In this illusion, only the background was moving…the fish-like objects were 100% stationary…yet, it appeared as though the fish were the objects not just moving (right to left), but SWIMMING! That is, right to left, with a bit of bobbing up and down. After watching the episode, I really started thinking how this ‘tricking of the brain’ could be applied to my eLearning content development process. So, I decided to develop two identical slides in Captivate 9, modeling the Swimmers illusion. Here’s what I found: In the first, -I randomly placed nearly 2-dozen fish-like objects on the stage. -I then added swimming animations to each of them separately (motion path right to left and custom path up and down) – I realize I could have duplicated 1 fish and 1 animation to save time, but the goal of this resides elsewhere. -I filled them with a solid green fill -I filled the slide background a bluish, (watery) color. -The whole process took me just under 2 hours. In the second, starting from scratch, -I randomly placed the same number of fish-like objects -But this time, I filled them with a vertical gradient (green and brown) -And this time I added a large rectangle to act as the background. I filled it, too, with a gradient, but a horizontal one instead (6 gradients spanning two blue colors…light, dark, light, dark, light, dark with equal spacing) -I gave the blue background shape a simple left to right motion path, and voila! Swimming fish! -This one took me just over 40 minutes to complete. Reducing my time by roughly two-thirds! The key here, is the use of contrasting gradients that led to the illusion of motion (just as the episode said!). While the graphics themselves are rather basic, the goal of this blog is to opening your mind to the consideration of strategically leveraging the power of a learner's brain during the development process in order to aid in the learning process. Check out the end result by clicking on my demo, floaters_demo.mp4 (To add to the illusion, one could even incorporate sound, as I have in my full version, or a background with an underwater scene). I hope this has been helpful, and I hope you, like me, will continue to think in terms of saving time while developing content by using the power of the brain to fill in the blanks! Until next time, shoot for the stars and BE the YOND! Adam |
 RSS Feed
